Discover how to secure your Smart Home and set up a secure and private WireGuard® VPN server in your home network in just a few simple steps.
Guide contents:
- Understanding Smart Home security
- How to Set Up a Home VPN Server
- Accessing your smart devices on the go
Understanding Smart Home security
Smart Home tech is on the rise - with more and more people controlling their home via their smartphone or tablet.
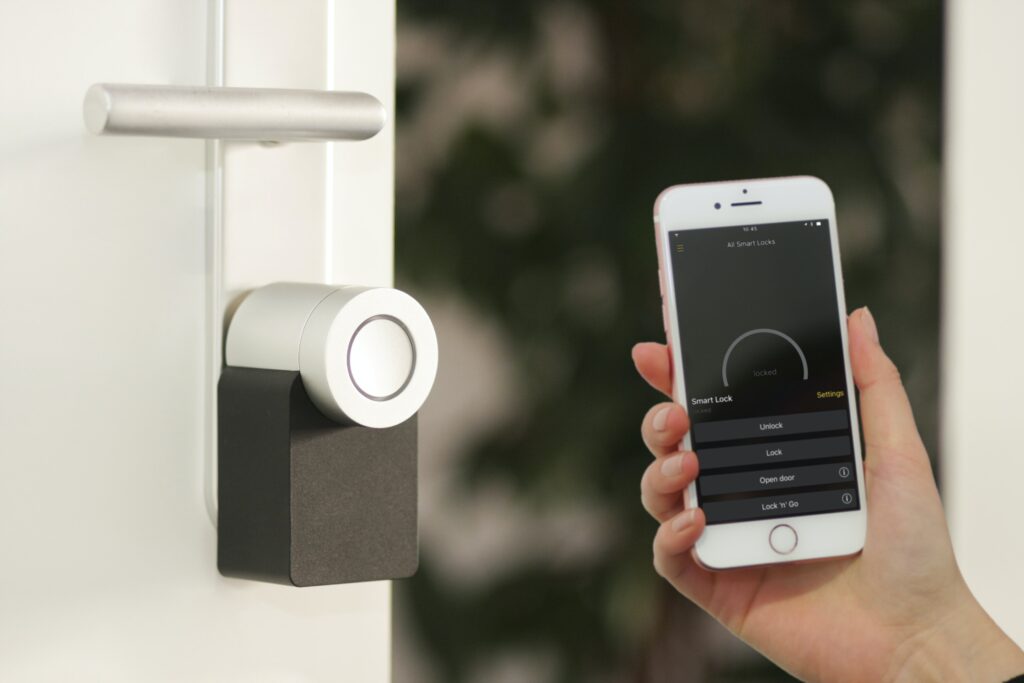
Popular IoT devices like smart locks, lightbulbs, thermostats, doorbell cams, alarm systems, etc. allow users to automate everyday processes and - in most cases - even promise secure remote access to the home network via external cloud servers.
Yet how secure are these solutions really? How many of you would be willing to hand over the keys to your home to outright strangers?
What are the risks of smart devices?
For most regular users, getting remote Smart Home access involves connecting to an external cloud server and sending sensitive data back and forth.
Purchased a cheap, smart camera online? As soon as you connect this device to your WiFi and start streaming video data to the cloud, you're opening up a potentially huge security hole in your home network - for both cyber and regular criminals. Why? If the cloud server connected to the camera is not secure and outsiders are able to hack into it, they could easily gain access to your home network and potentially all the devices within it.
Examples of poor security include:
- Insecure default passwords
- No Two-Factor-Authentication (2FA)
- Lack of encryption
- Out of date security software
- Poor or no data protection regulation
However, this doesn't mean you have to stop using smart devices all together. On the contrary, when used safely, IoT technology is great and makes a practical addition to modern homes.
Set up a VPN Server at Home
Setting up a VPN server in your home network empowers you to take your security into your own hands. Remotely access your smart devices and control your Smart Home on the go - as though you are connecting locally at home.
What is a VPN?
A (virtual private network) securely connects an enduser to a remote network via the internet by creating an encrypted tunnel to transfer data back and forth. Once a VPN connection has been established, users can access the remote network as if they are physically in that location - even if they're hundreds of miles away.
What you need to set up a VPN server at home:
- A public IP address (you can request this from your internet provider if you don't have one already)
- A Dynamic DNS address (hostname)
- A VPN compatible gateway
- A VPN protocol - the most popular include OpenVPN, IPSec, WireGuard® & PPTP. Check with your gateway to see what's available (VPN Tracker supports all leading protocols)
- A VPN client - we recommend VPN Tracker for Mac and iOS 🙂
Step one: Set up Dynamic DNS
Public vs. private IP addresses
Typically, home networks use a NAT router that assigns each connected device an internal (private) IP address to be used on the local network. Smart devices connected to the router like cameras, thermostats, alarm systems, etc. won't have external (public) IP addresses, meaning they won't be directly accessible via the internet. This prevents you from obtaining remote access - i.e. via a VPN.
You can easily request a dynamic public IP address for your router from your ISP (internet service provider.) This will make your devices available online, but is not suitable for VPN access, as the IP address is periodically updated. As soon as the IP address changes for the first time, the VPN tunnel would be pointing to the wrong address and will no longer work.
Unfortunately, if you want a static IP address that doesn't change (the most typical option for VPN), this will almost always result in a significant charge from your provider, as these are usually reserved for business users.
The solution: Dynamic DNS. It's easy and free to set up and is an essential step in configuring your own VPN connection to your home network.
What does Dynamic DNS do?
Registering your gateway's dynamic public IP address with a Dynamic DNS service allocates a specific URL (hostname) to your device. Whenever your public IP address is updated by your ISP, the Dynamic DNS service will recognize the change and update the DNS record accordingly to keep everything up and running.
Where can I register for Dynamic DNS?
Some devices offer their own DynDNS services (e.g. FRITZ!Box, ASUS, etc.) or provide a list of recommended services - refer to your gateway for more information. Alternatively, a free service like dynv6 is also a great choice and enables you to get set up in minutes:
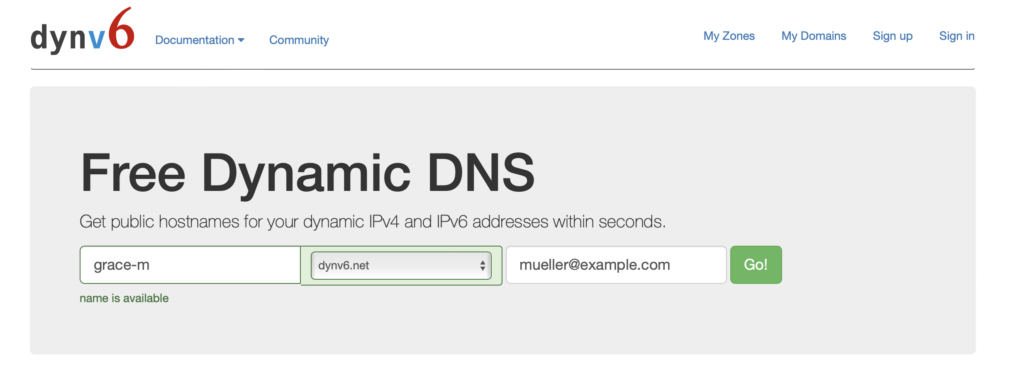
When you register your new hostname with a service, you'll also be instructed to set up a username and password, needed for the configuration on your gateway.
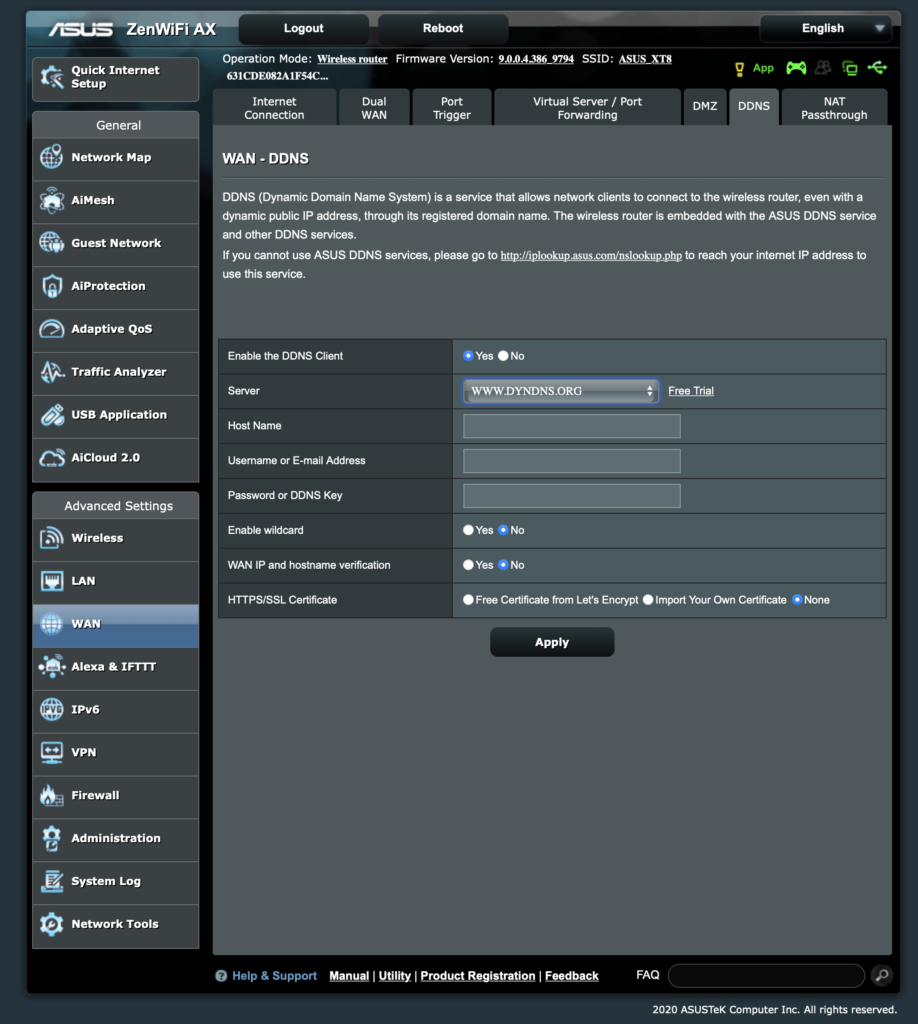
Configure Dynamic DNS on your gateway
The final step is registering your new hostname on your VPN gateway. The process is the same for the majority of devices:
- Log in to your device interface and find the advanced settings menu. (Tip: If you don't know your login details, they are usually provided on a sticker on your device)
- Locate the settings for "DynDNS" / "Dynamic DNS" / "DDNS"
- Enable Dynamic DNS for your device
- Choose a DNS provider from the available options or select custom if yours is not listed
- Fill out your login and password using the information generated in the previous step and enter your new hostname (e.g. grace-m.dynv6.net)
Step two: Configure VPN on your gateway
Each VPN gateway will have slightly different setup instructions depending on the type of device and the VPN protocol you are using.
Which VPN protocol is best?
If you are new to VPN (or even if you're not!), you may prefer a modern VPN protocol such as OpenVPN or WireGuard®. Both of these are open source, super easy to configure and offer good connection speeds for a typical Smart Home use case. They both also use a configuration file to get set up and can be up and running in minutes.
IPSec VPN is also a good choice and is supported by almost all vendors, however it can take a little longer to get set up - especially if you're not experienced in networking. Generally, we would avoid PPTP where possible, as it has some known major security flaws.
Setting up a WireGuard® VPN connection
We have chosen to configure WireGuard® VPN, due to its easy configuration and impressive performance. However, if you want to connect to a different protocol - i.e. because your device doesn't support WireGuard, you can refer to our configuration guides or follow your vendor's instructions.
How to set up WireGuard® VPN in 3 steps:
- Log in to your device's web interface and locate the VPN settings
- Choose WireGuard® from the VPN options and fill out the required fields
- Save your connection to generate your personalized configuration file (you'll need this for the next step!)
Step three: Configure your VPN client
The last step involves configuring your connection in your VPN client.
What is a VPN client?
A VPN client is a specific type of software which establishes a secure connection between a device and a VPN server. You need a VPN client in order to connect to your VPN and access your network remotely.
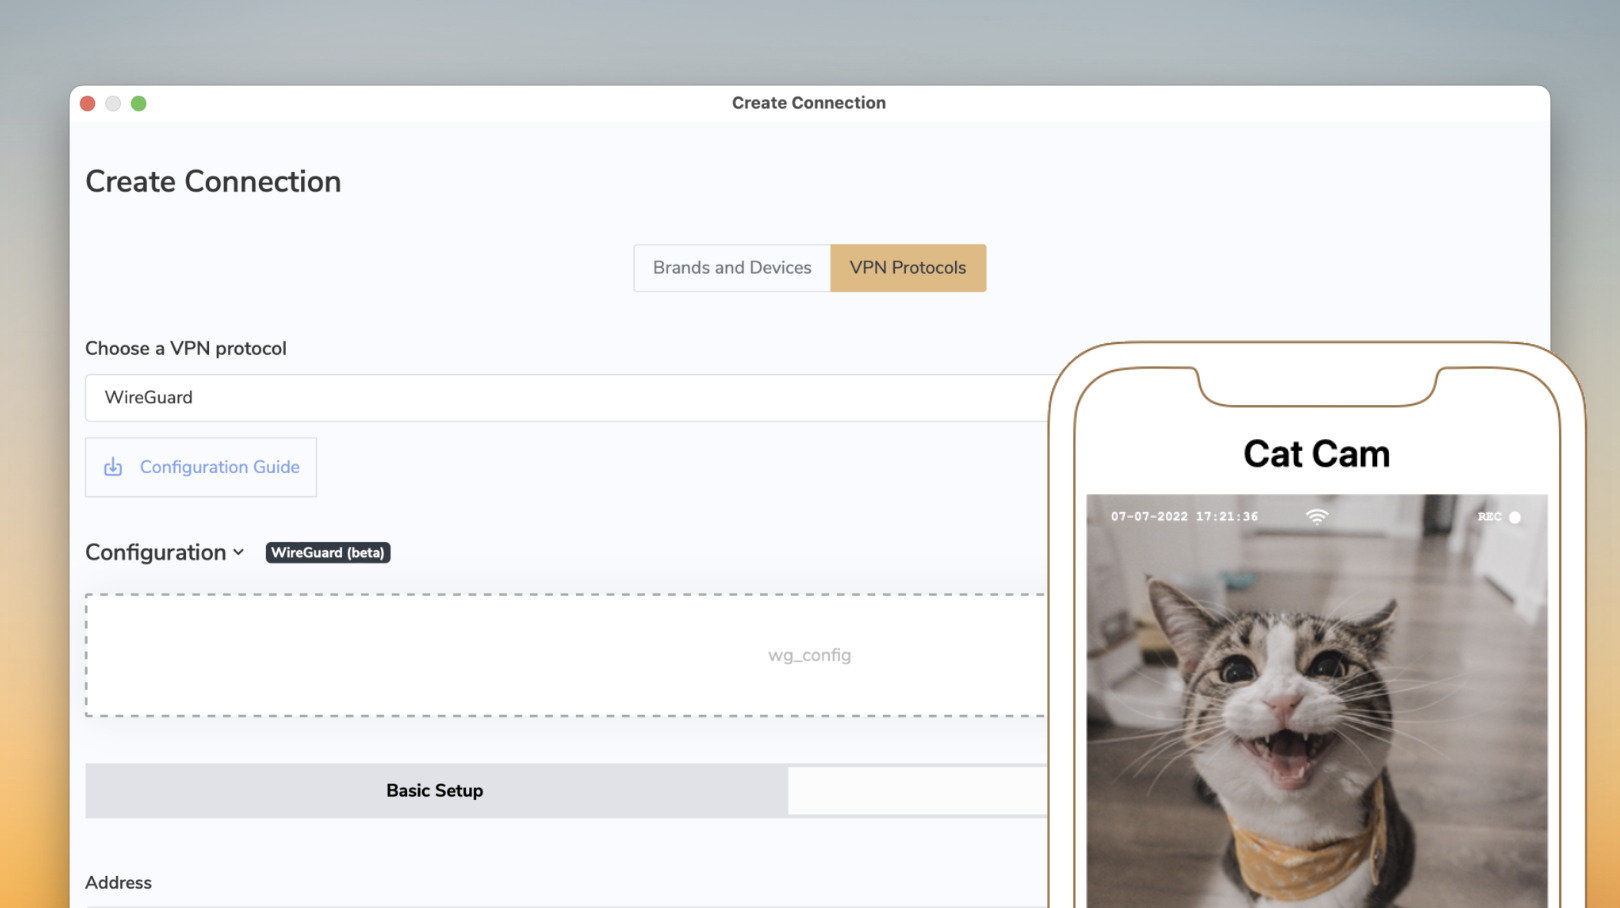
The latest VPN Tracker version offers support for WireGuard® VPN on macOS and iOS (Beta) - meaning you can remotely connect to and control your Smart Home from your Mac, iPhone or iPad. Configure your connection using QR code or with a .conf file.
Here's how it works:
- Download VPN Tracker free on your Mac, iPhone or iPad
- Create a new connection and choose WireGuard®
- Upload your .conf file or scan your QR code to import your connection settings
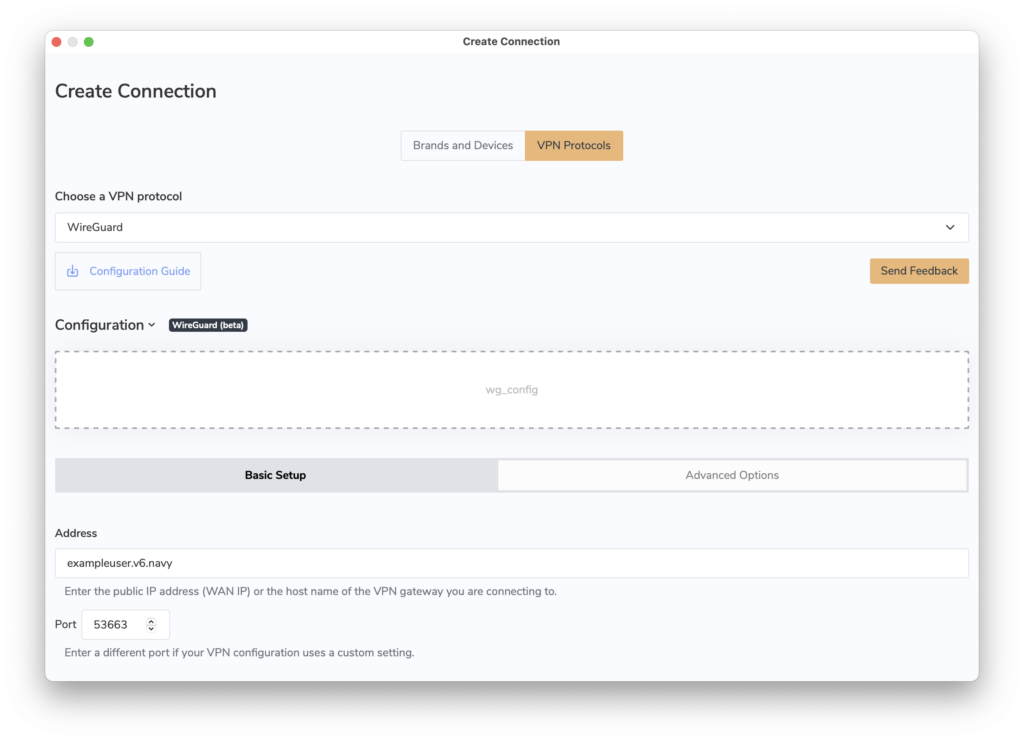
It's as easy as that. You can now save your new WireGuard® connection using Secure Data Transfer and connect to your home network from another location on your Mac, iPhone or iPad!
My VPN Server is set up - what now?
Your VPN server is up and running - meaning you can now enjoy secure external access to your Smart Home and devices.
Access smart devices on the go
You can connect to your home network from another location using your new WireGuard® VPN in VPN Tracker on your Mac, iPhone or iPad.
Simply open VPN Tracker and start your VPN using the connection slider:
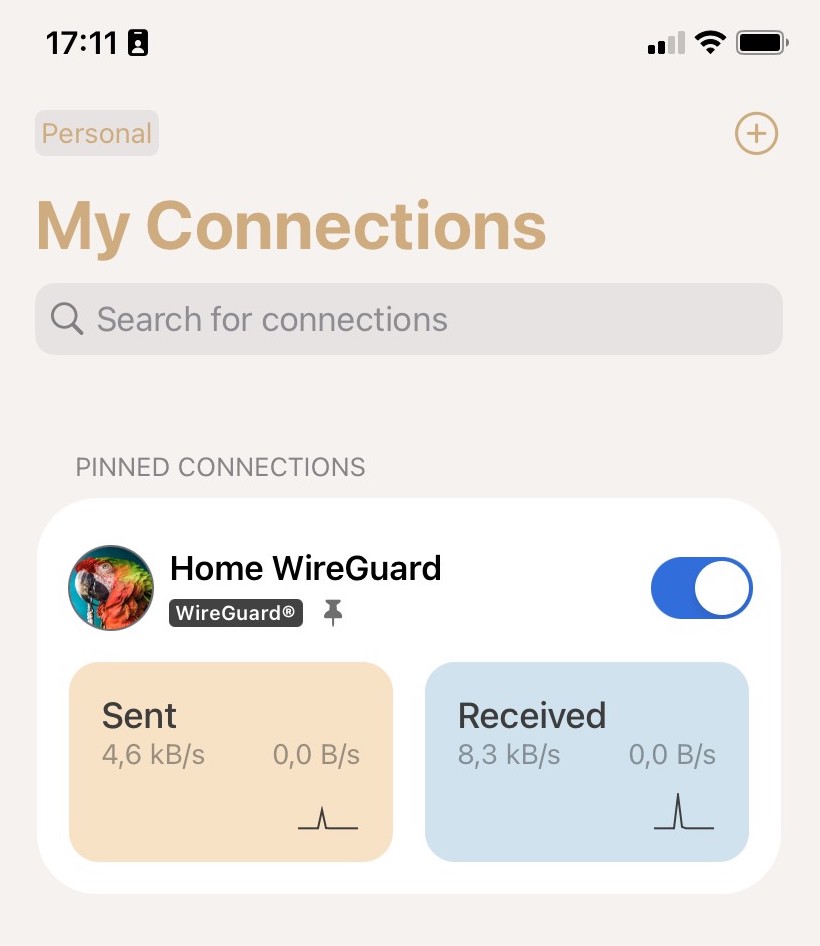
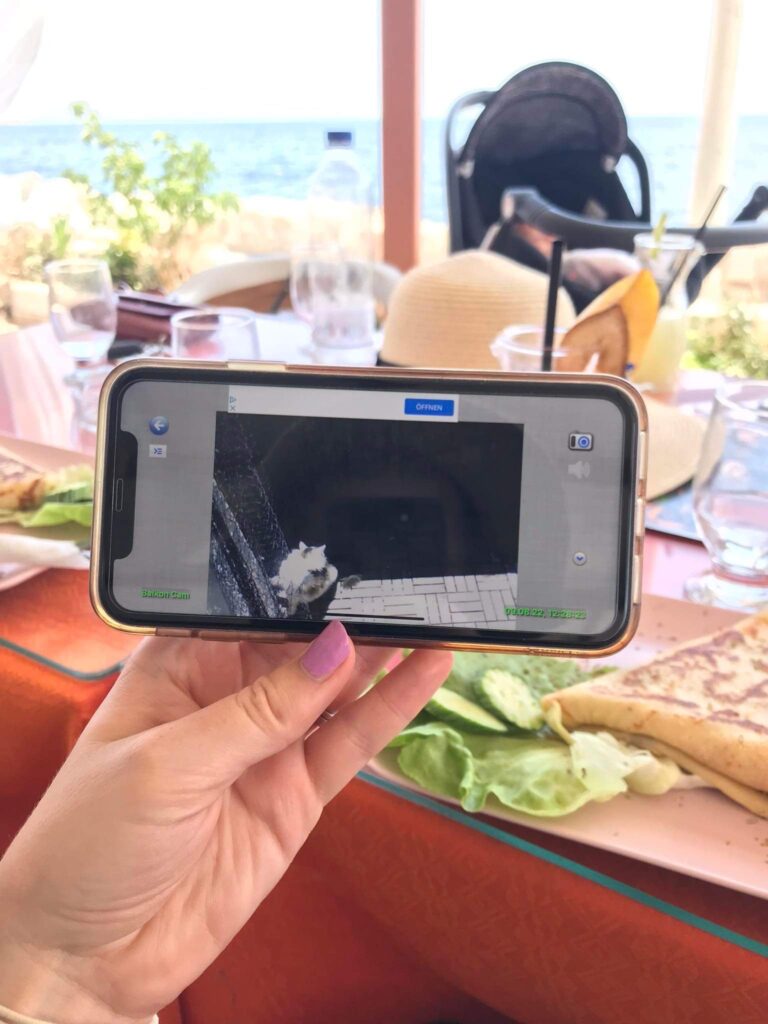
Connect to VPN to enable your alarm system on the go, check in on your four-legged friends on vacation, or turn on your central heating ready for when you arrive home from work - all without needing to rely on untrustworthy third party cloud services.
“WireGuard®” is a registered trademark of Jason A. Donenfeld.
![]()
Trust the #1 VPN client for macOS and iOS:
VPN Tracker securely connects thousands of Macs, iPhones and iPads worldwide with VPNs every day. VPN Tracker was developed from the ground up in our head office in Munich. You can trust in our long experience working with advanced VPN technology.
For Mac from OS X 10.11 including macOS 12 Monterey and for iPhone & iPad from iOS 15


Thanks for the guide, I've been meaning to try this out 👍