How-to Guide: Connect your Mac to your office network via VPN
Whilst working in the office, secure access to important data is taken for granted. However, with more and more of us now working from home, the need to externally access the office network is greater than ever before. When it comes to accessing sensitive company data from outside of the office, it’s important to know you are going about it the right way.
How can I access my company’s network from my home office?
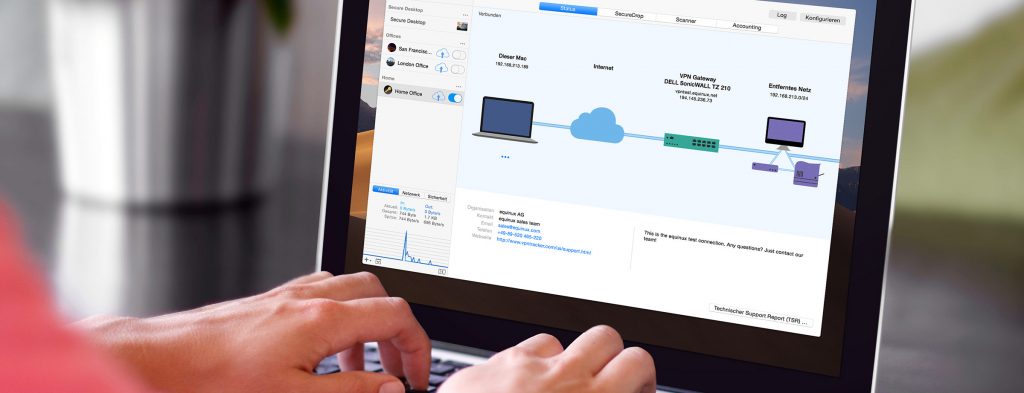
When working remotely, the best and most efficient way to connect to your office network is via a VPN. A VPN creates a secure tunnel between your home and office networks which allows you safe access to all your internal services. However, with so many options out there, it can be hard to know where to get started.
Which VPN service do I need?
With most standard VPN services on the market, only a secure connection is provided. The rest is up to you. VPN Tracker is the best choice for professionals looking to connect remotely to the company network. As well as the highest security standards, VPN Tracker offers a complete service specifically tailored to the needs of your business.
Here’s how to use VPN Tracker, the number 1 VPN client for macOS, to connect your Mac to your office network.
How to Use VPN Tracker to Connect your Mac to Your Office Network
For you to get started with VPN Tracker, your network administrator will first have to set up a team and add you to it. Once they have done this, you can carry out the following steps to get set up. If you are an admin, refer to the device configuration guides for more detailed setup instructions.
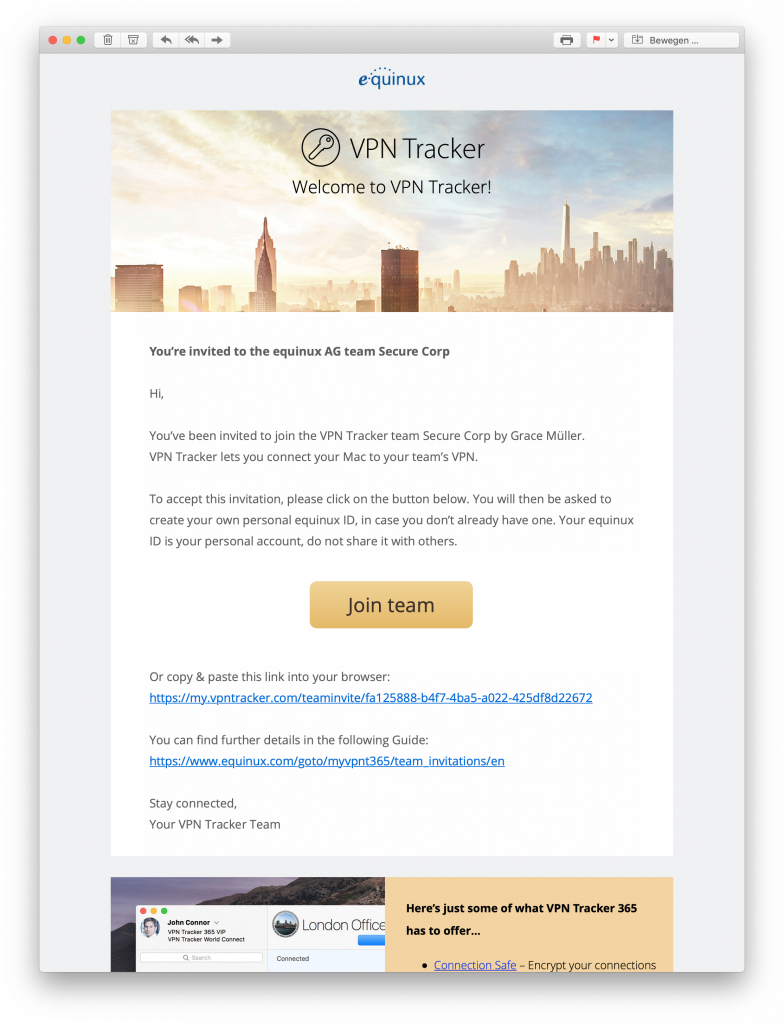
Step One: Accept your team invitation
You will receive an email invitation from your admin. Click on the link in the email to accept the invitation and join the VPN Tracker team:
Step Two: Create an equinux ID for your account
You will now be asked to create an equinux ID. This is your personal account to use with all equinux services and will be your login for VPN Tracker app and the my.vpntracker portal.
Step Three: Download the VPN Tracker app
Once your account has been set up, you can download the VPN Tracker app and log in with your equinux ID. Your admin should have assigned you a plan by this point so you can start using VPN Tracker.
Step Four: Start your connection in TeamCloud
When you start VPN Tracker, all of your available company VPN connections will be downloaded into your TeamCloud.
Simply click the connection slider to start your VPN. Please note, the first time you launch a connection, you will be asked to enter your user credentials. This may be your internal login for your IT system, or a different login. Make sure you clarify this with your admin.
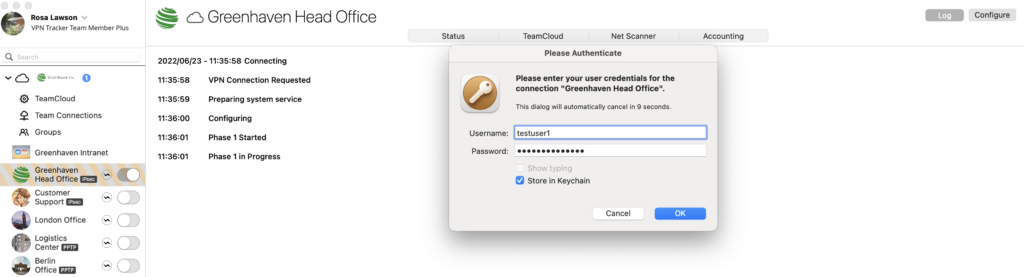
Pro tip: Once you have entered both your login and password, check “Store in Keychain” so VPN Tracker will remember it every time you need to connect.
Learn more about VPN Tracker on our website, or contact us directly for a quote or if you have any questions.

Protect your data with VPN Tracker 365 - the #1 VPN client for OS X and macOS:


Start now! Requires Mac OS X 10.9 or later